Parts / Tools Guide for Wiring Your Home
This parts guide is broken up into three sections. The first is what you will need to run wiring during construction. The second section covers what you need to complete your work. The final section is for running wires in an existing home. You do not necessarily need everything in this list, and you may find some things listed here (like a pen) are really obvious. Still I listed them anyway because not having a pen while at your home under construction which is 20 miles from your current home is no fun.
What you need to install wiring during construction
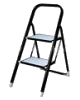
There are many reasons you will need a step stool or ladder, and the step stool is easier to carry around. You will need a stool for tacking up wires to run along beams in the basement, fishing wires through the ceiling, mounting motion detector wires up high... The step stool is more useful than a ladder because it is easier to carry around.
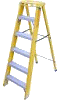
Sometimes a step stool will not cut it. Remember that you may be running wires above the ceiling. In-ceiling speakers for the first floor will run along the second floor beams. If you have 9' ceilings, the first floor to the second floor is actually 10 feet (with 1' beams supporting the second floor).

You will need a drill to make holes through studs and floors to run your wires. With a corded drill you don't have to worry about batteries, but you can't be sure that your house will even have power when you are wiring it. The wall outlets won't be completed until the drywall is done, so at best you may have an outlet to use in the basement.
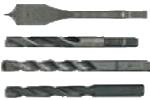
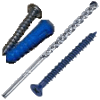
Of course you need bits to go with the drill. A 1/2" bit will only allow a couple wires through and will not be enough for all situations. A 1" bit will work for almost (but not quite) everything. Spade (flat) wood drill bits (top in the picture) are cheaper when a larger bit is needed but they can cause problems. Spade bits will get stuck easier and they make it harder to drill straight line which can be a problem if you are drilling through multiple studs. If you need to drill two 1" holes next to each other to run a thick wire (like a DVI cable) a spade bit will not work because it will always jam.
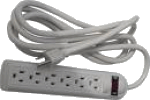
You will need power if you are going to recharge the batteries on your drill. You may also need power for lighting. If you do have a working outlet in the basement, the builder's contractors may already be using it. Bring an extension cord with multiple outlets or a power strip so both you and the contractors will have power. You will also need very long extension cords if the only power source is the electrical box in the basement and you need lighting on the second floor.
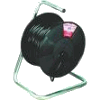
A cable reel makes it easier to pull on the wires without them get the tangled. A cable reel can be as simple as an elevated bar and can hold multiple spools of cable. I've even seen people hammer a screwdriver into a stud and use that for a cable reel. It is important to note that the spool of wire must rotate as you pull the wire. If you just pull the wire off the top of the spool it will have a twist to it and make it very hard to run.
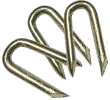
Wire staples serve 2 purposes. First, they prevent wires from accidentally being pulled out of an electrical box. Second, they keep your wires neat and tight up near the ceiling in the basement.

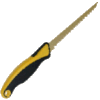
You will need a hammer for attaching electrical boxes to studs. You may also use a hammer this to nail in the wire staples, assuming you don't own a staple gun. A claw hammer can also be used to remove staples. It can also to be used with the chisel.
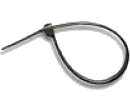
Zip ties can also used to keep your wires neat. You should get the 12" nylon variety. If you are running too many wires for a wire staple, you can use a wire staple to attach the zip tie to a beam and then run the wires through the zip tie.

You will need a good pair of wire cutters to cut your wires, and you can also use them to cleanup the zip ties.
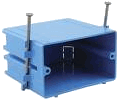
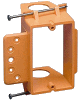
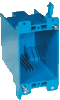
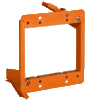
Your local town's code may or not require electrical boxes if you are running non-electrical wire (like speaker wire), but it is best if you use them. Make sure it is OK with your builder first because the drywall'ers will have to cut out a hole for each box. I prefer the blue plastic electrical boxes. They are easy to mount and run wires through and have notches indicating where it should be placed on the stud. Make sure you have a wiring plan and know how many 1-gang, 2-gang... boxes you will need. When doing work before drywall is installed, use New Work electrical boxes that mount directly to the stud.
You may also want to consider a low voltage box instead of an electrical box for non-power wires. Check with local codes to see if it is acceptable. These boxes are sometimes easier to work with since they don't have a back. I wouldn't use them on exterior walls because they cannot be sealed and you might get cold outside air coming through them.
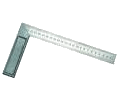
Different towns might have specific requirements, but usually electrical boxes are mounted 12-16" above the floor. Note: There are different rules for basements where flooding can be an issue. In my home the boxes were exactly 12" from the floor, and using a 12" Square is a lot easier than a tape measure to measure box height, so bring one if you have it. Otherwise, you could use a tape measure and mark all of the electrical box locations up front. You want to make sure your electrical boxes are the same height as the builder's electrician's boxes or the boxes will look odd next to each other. Sometimes, the electricians will just use the height of their hammer to make sure each box is the same height.

Expanding foam (like Great Stuff) is used to fill in holes in electrical boxes to insulate the home and prevent drafts. Make sure you are absolutely sure that you are done wiring that box before you use the foam. Make sure the type of foam you get can be used for wiring in electrical boxes. The foam can expand to 10 times its original size, so before using the foam in an electrical box you should test it to familiarize yourself with it. You may want to save this step until after you have finished the wiring.
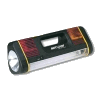
If you end up working late at night you will wish your brought a flashlight. A fluorescent flashlight or good lantern will work better than a spot flash light.
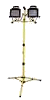
If you know you have power in the basement, you may want to set up a halogen light down there. It gets dark in the basement quick without lights and that is where you will be doing most of your work.

Don't forget to bring a pen and a marker/Sharpie. Use the Sharpie for marking studs and doing your labels. The pen is for taking notes.

Once you move in you are going to want to know where all those wires in your basement run to. I use standard computer labels to indicate which wire is which using a letter/number code. See my first and second wiring projects for an example. I also label the wires in the electrical box if there is more than one wire of that type.
Use a notebook or a clipboard so it is easier to take notes. I've tried bringing just paper to write on, but homes under construction end up being really humid and the paper gets trashed. A notebook is better. You will want to record information about each photo and the location of all wires not using electrical boxes.
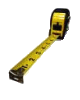
For any wire that is not in an electrical box (alarm, in-wall speaker, garage door wires...) you will have to go digging through drywall to find it. Have a tape measure to record where the wires are relative to the closest corner. Record the location of the wire, the height from the floor and also indicate what side of the stud the wire is on.

If you have a Digital Camera, use it to take pictures of everything. Since all rooms look the same without walls, you should also record what room and what direction each picture is. You never know when this information will be useful (and not just for wiring purposes).

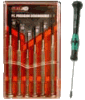
You might need a flathead screwdriver to remove wire staples if you can't use the claw of your hammer. You will also need a screwdriver to cover the electrical boxes with electric plates once the drywall is installed.

Your town's building codes will probably require electrical plates cover all electrical boxes to pass the electrical inspection before you close, even if there are no wires running electricity in those boxes. I used cheap blank wall plates and then replaced them over time after closing. You could also use the proper wall plates and terminate everything before closing, but then the town may see it and it could affect your final assessment. Make sure your wall plates include screws or you will have to buy them separate.

Whenever using your hammer expanding foam you should wear goggles.

If you are working around insulation, or if the builders are installing the insulation while you are in the home, you should wear a mask.

The warning on the label says you should wear gloves when working with expanding foam.
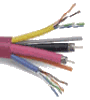
And of course you need wire. Create your Wiring Plan to see how much and what kind of wire you need. Don't forget to count the vertical distance when measuring wire length, and always add extra to make sure you don't run short. Remember to get wire that is rated for in-wall installation across multiple floors. The example wire on the left is structured wire that contains coaxial and Internet cables in one. This costs more than buying separate wires but is easier to deal with.
What else you need to complete the wiring after drywall is installed
If your wires don't terminate in an electrical box (speaker wires), then you probably just stapled the end of the wire between two studs. Use a stud finder to make sure you know where the studs are before knocking holes in the wall or ceiling. You don't want to cut a template for a speaker and find that part of your hole is over a stud.

For stripping speaker wire or network cable. You could also use a razor blade for some applications.
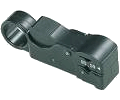
Coax cable must be stripped in a certain way which is covered in the Finishing section. This can be done with ordinary wire strippers, but it is a lot easier with a special coax stripper.

There are special crimpers for coaxial cable. You should look for one that supports both RG59 and RG6 connectors. It should also be a ratcheting tool, meaning that the tool will not reopen until you have squeezed it tight enough.
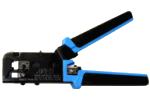
You will also need a special crimper(s) for Cat-5e Data/Internet connectors (called RJ45) and Cat3 Phone connectors (called RJ11). Note: Punch blocks and some wall plates don't require you to crimp a connector on the end of the cable so this tool may not be necessary. You may find one tool that can do both types of cables.
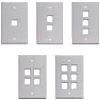
You can either get empty face plates and snap-in your connectors, or get a pre-made face plates with connectors already on it. From your Wiring Plan determine how many plates you will need, and how many holes in each, and then get them in bulk.
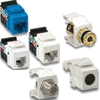
Get the connectors to go with the wall plates, again based on your Wiring Plan.
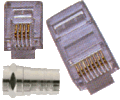
You will also need RG6 (Coax), RJ45 (Cat5e Data), and RJ11 (Cat3 Phone) end connectors for your Wiring Panel.
For mounting outlets and wall plates and also for wiring an alarm system.
As you can see from my Sample Projects I avoid using pre-made wiring panels. You may want to invest in one if you don't have a basement and your wires will be visible in a room or closet. I find that Wiring Panels don't support the large numbers of wires I want to run and aren't worth hundreds of dollars.
An alternative to a wiring panel is to mount everything to a board. You can now get 2'x4' boards which are just the right size. You can also use 2"x4"'s so that the board is not mounted directly to the concrete wall. That way, every time you screw through the board you are not hitting concrete.
For a basement you will need concrete screws or sinkers and a masonry drill bit. For a drywall installation you will need drywall mounts or drill directly into a stud (preferred).
Extra tools you will need for running wires in an existing home
A coil of rigid steel used to fish wire through walls after the drywall has been installed. First run the fish tape through the wall, attach (tape) your wire to the end, then pull the fish back through the wall.
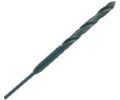
These flexible drill bits are usually 3' to 6' long and allow you to drill through multiple studs, joists, or through the top/bottom wall plates and you only need to cut a single small hole in the drywall. Just make sure you look before you drill.
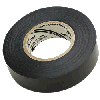
You will need electrical tape to attach your wires to the fish tape.
For cutting holes in drywall for new outlets or speakers.
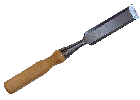
You may need to use a hammer and chisel to notch holes in studs or joists if you need to run a wire across the wall or ceiling.
Old work electrical boxes don't nail directly to the stud. Instead they have flaps that expand out and pinch the drywall after you insert the box through the hole.
Low voltage boxes don't have a back and may be easier to deal with when there are a lot of wires. Don't use these boxes for power wire. Also, I wouldn't use them on exterior walls because they cannot be sealed and could let cold air into the home.
Where to get the wires and other parts on-line
- CablesToGo.com - For bulk wire and specialty cable
- Monoprice.com - Another good site for wires and cable
- CableWholesale.com - For bulk wire and specialty cable.
- RamElectronics.net - Cables, adapters, splitters...
- SmartHome.com - Electronics, alarms, surveillance, distribution...
- LSDInc.com - Labor Saving Devices for running wires