Terminating and Wiring Wall Plates
This guide will deal with terminating at the wall plates for audio/video cables, wiring in-wall/in-ceiling speakers, volume controls, IR Repeaters, surveillance, and computer wires. There are separate guides for wiring the Wiring Panel, Alarm Wiring, and wiring for Home Automation.
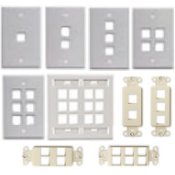
First you must purchase the wall plates for each outlet. Most of the time, I like to get the Leviton QuickPort 10 pack snap in modules of Cat3 Phone, Cat5e Data, and Coaxial connectors. I usually have at least 4 wires at each outlet, and the snap in connectors make it easy. If you are only going to have 1 or 2 wires at each outlet, you can save money by purchasing an all-in-one wall plate. There are premade plates for a single phone line, single coax, phone + coax, Cat5e + coax, speaker connections... You can find phone + coax wall plates online for under $2. The Leviton snap in modules are usually $2 for each wire plus another $2 for the wall plate. You can get even better deals for speaker connector plates that have everything nicely labeled. If you want specialized HDMI, USB, DVI... wall plates, you will need to look at other companies like Calrad Electronics.
Terminating Coaxial wires
| For coaxial wires, you must crimp on a coax connector before connecting the wire to the wall plate. Do not use the twist on connectors. You can use a standard wire stripper to strip the coaxial cable, but a custom coax stripper will give you a perfect cut. |  |
|---|---|
| Whether you use a standard wire stripper or a special coax wire stripper, the wire should look like this (only smaller). After stripping the wire, push the braid back on the wire. Only the inner core should be visible after the wire is crimped. A quad-shield cable will have two sets of braids. Both braids should be treated the same. |  |
| Be sure to get the correct RG6 (not RG59) connectors. Make sure that the braid and the inner core do not touch. All of the braid should be hidden. The inner core should be in the center of the connector, and the white plastic insulation should come to the edge of the small hole in the middle of the connector. |  |
| It is best to get a ratcheting crimping tool. Make sure to use the RG6 sized hole in the crimp tool. Usually it is safe to crimp as far back on the connector as possible. If you get too close to the front, you wont be able to crimp the wire. |  |
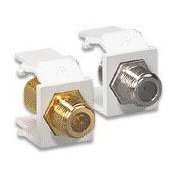
| you attach the RG6 connector you can connect it to the snap in wall plate jack.wire. |  |
Terminating RJ-45 (Cat5/Cat5e/Cat6 Data)
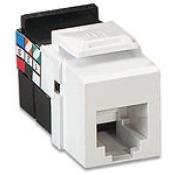
There are two standards for wiring RJ45: TIA/EIA 568 A & TIA/EIA 568 B. The A standard provides backward compatibility with phone wires. The inner 4 wires are wired the same (orange stripe, blue, blue stripe, orange) for both phone and data. The B standard is more common, perhaps because it is not backwards compatible with phone wires. Plugging in a computer to a Network jack that is actually wired for phone can damage your computer when the phone rings. While using Cat5e jacks for both data and phone may be convenient, there is no visual indication if a jack is for phone or data. Connecting a computer to a RJ45 jack that is wired as a phone might damage the network card when the phone rings. The wiring for both standards is below.
The examples above are for a Cat5e Leviton connector. Different company's products might be wired differently even though the pin order is essentially the same. For all products, expect to find the color codes labeled directly on the jack with the A and B labels.
These jacks should also come with a punch-down tool that will help you push the wires into each slot. After placing the wires, cut off the excess with wire cutters or a razor blade. There should also be some sort of snap on cover that will protect the wires.
As you wire a RJ45 jack, make sure you keep the wires twisted as long as possible. Do not have a long length of untwisted wire exceeding 1/2 inch. Untwisted wires cannot maintain as high of a speed for the data connection.
Terminating RJ-11 (Cat3 Phone) wires
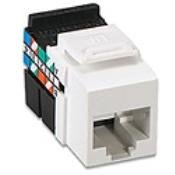
There are two styles of phone jacks. The old standard use black, red, green, and yellow wires. Each wire had its own screw on the back of the plate, as seen to the left. The new standard uses jacks similar to the RJ45 jack. To convert the old color standard to the new standard:
| Pin | Phone Color | Cat3/Cat5e Color |
|---|---|---|
| 1 | Green Stripe | |
| 2 | Black | Orange Stripe |
| 3 | Red | Blue |
| 4 | Green | Blue Stripe |
| 5 | Yellow | Orange |
| 6 | Green |
If you are using Cat5 or better wire as phone wire, then you will not be using the brown wires. Most people don't bother to use the green wires either. They are only necessary if you are going to run 3 different phone lines to your home. The wire from the street probably only has 2 pair for 2 separate phone lines. With cell phones and VOIP (Voice Over Internet Protocol), three different phone land lines are not required unless you are running a business.
Wiring a snap in RJ11 jack is similar to a RJ45 jack, except that there are 6 pins instead of 8, and the two outer pins are optional. This Leviton jack is labeled with both the old and new color standards.
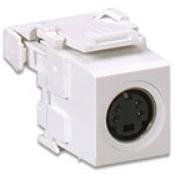
Terminating S-Video Wires
S-Video cables consist of 2 signal wires: Y (Luminance) & C (Chrominance) and 2 grounds where each signal wire has its own braid ground. It is cheaper and easier to run 2 separate Coaxial cables for S-Video instead of purchasing specific S-Video cable. You can even use Cat5e cable for S-Video cable, although Cat5e doesn't have the shielding that Coaxial cables have. S-Video jacks work similar to the punch down RJ45 jacks except that there are only 4 punch down connections and they are located in the back instead of the top. You will notice that the 4 colors for S-Video (Blue, Blue Stripe, Orange, and Orange Stripe) are the same inner 4 colors for RJ45 data and RJ11 voice jacks as Leviton expects you to use Cat5e wire for S-Video. Your wire may or may not have wires that use these 4 colors. Just make sure that you use the same color for the Y and C signal wires at each end. If you do use Cat5e, leave the brown and green wires unused, or use them for a second S-Video cable. If you use coaxial cable, the solid wires are the ground which should be connected to the shield/braid.
Terminating Composite/Component/RCA Wires
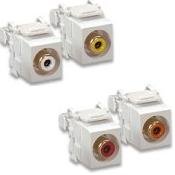
Composite, Component, and RCA wires all have the same end connector. There are two common types of end connectors: solder and coaxial connectors. Use a coaxial connector when using coaxial cable. Crimp the coax end onto a coax cable as explained above, and then screw on the RCA connector (left) on to the end of that. When using 2 conductor wire, solder the wires to the 2 pins on the RCA connector (right). Remember to put the cover over the wire before soldering.
Wiring In-wall/In-ceiling speakers
In-wall speakers are typically rectangular and in-ceiling speakers are usually round. Each speaker will come with a template to show how large a hole should be cut in the drywall. Be sure to locate the studs on each side of the speaker before cutting the hole. I usually start with a small hole in the center to make sure I can find the speaker wire behind the wall and to verify the position of the studs. Some speakers come with special mounting brackets, but most simply have arms that fan out behind the wall. Turning screws on the front of the speaker will spread out the arms and pinch the wall. As you can see from the picture on the right, the arms need at least 1/2" on each side to spread out, so the speaker cannot be right next to a stud. For this reason, you should not mount an electrical box on a stud to mark the location of your speaker wire.
Wiring a Volume Control
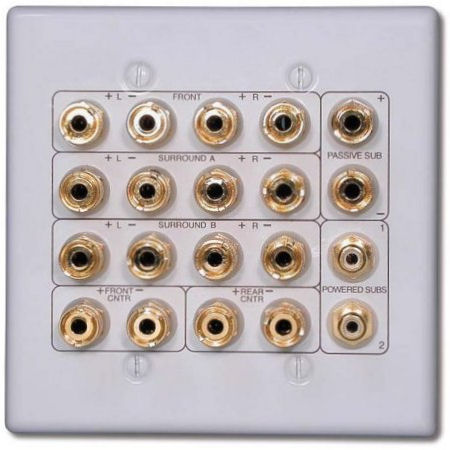
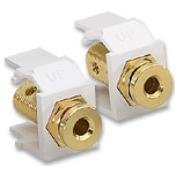
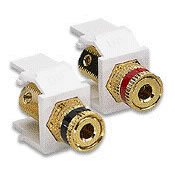
Volume controls mount in a single gang electrical box. Standard analog volume controls will have 4 pair of connectors on the back: + and - for both left & right input and left & right output. The speaker wires for each speaker in the pair run from the amplifier to the volume control and then to each speaker.
Digital volume controls will change the volume directly at the amplifier. These control units usually must be the same brand as the amplifier. A Cat5 wire connects the digital volume control and the amplifier. This wire provides both power and signal. The speakers run directly from the amplifier to the speakers.
Leviton QuickPort Connectors
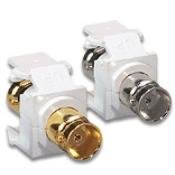

Snap in jacks for wall plates and end connectors are available from: Leviton QuickPort, OnQ/Legrand, Cables-To-Go, SpeakerCraft, Calrad Electronics, Ideal...