Running the Wires for Structured Wiring
How to run the wires
Here are some sample pictures of what your wiring should look like for a new construction.
Click on any image to see a larger version.
| When installing an electrical box, drill a hole in the floor between the studs on the same side as the electrical box. Staple down the wire right above the hole and right under the electrical box. Drill multiple holes if there are many wires. Just be sure not to drill through the wires from the previous hole. | 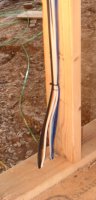 |
|---|---|
| An extra staple would be required if this box was higher off the floor. Both the box and the hole in the floor are insulated with expanding foam. | 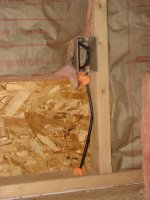 |
| The wire is coiled in the box so it will not interfere with the drywall which will be installed next. | 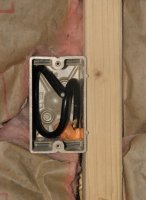 |
| The builder will usually run electrical wires around the outside of the house. Run your wires internally and away from any power wire. Run the wires along the joist. Any wires that run under a joist perpendicular to it could cause problems later if you finish your basement. It can interfere when installing a ceiling. | 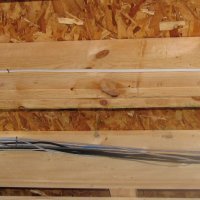 |
| When your wires are near power, it should be perpendicular to the power wire. | 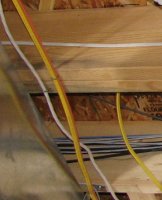 |
| When you do need to run wires near a duct or plumbing, be sure to leave some slack so that the other installers can move your wire if necessary. Don't assume that you know exactly where the duct will be run. | 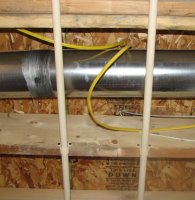 |
| Slack was left in this wire to make room for the ductwork that was to be installed later. This shows how important it is to know where the ductwork will be installed. | 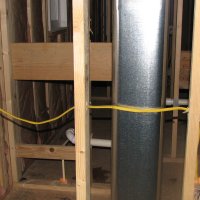 |
| This wiring is for a flat panel TV above a fireplace. There is an electrical outlet and a separate outlet for the audio/video. | 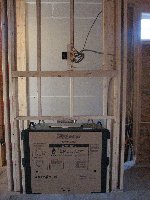 |
| From this angle, you can see the audio/video wires run from above the TV to an area next to the fireplace where the stereo components will be located there. Maybe there will be built-in bookshelves on either side of the fireplace to hold the components. | 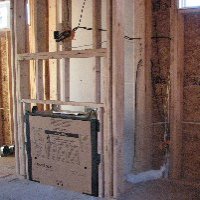 |
| Run all of the wires to a central location in the basement/wiring closet. I run mine near the electrical box, but a couple of feet away from it. Leave enough wire so that you can move your wiring panel a couple feet in any direction. Loop the wire and use wire ties to keep it together so it doesn't rest on the floor. | 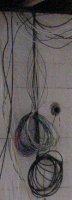 |
How to avoid ductwork, electrical, plumbing...
As you are installing your wires it is important to be able to identify what the other installers are doing and where they are doing it. Usually, the HVAC installers will first rough out their ductwork so that the plumbers, electricians... will know where the ducts will be. The ducts wont actually be installed, but the location and shape of certain holes should tell you everything you need to know.
Click on any image to see a larger version.
| This is a hole for your standard floor vent. Floor vents are usually at the edge of the home and are placed under windows. There will be a duct running from this hole to the furnace. | 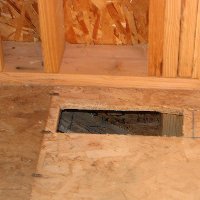 |
|---|---|
| Sometimes, the builders will take the rectangular piece of floor that was removed for the vent and nail it above the hole on an angle. This is done so that no one accidentally steps in the hole and breaks an ankle. These holes are no different than any other floor vent. |  |
| Another way of covering a floor vent. |  |
| This could be either a return or a vent. If it is in a bathroom, then this will be a vent. Returns should be placed high on the wall, but if that is not possible (in a room that is all windows), this could be a return. | 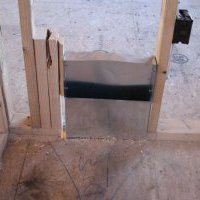 |
| Many times there is no room in a kitchen to place a vent, so it is installed under the kitchen sink. Before the cabinetry is installed, this will just be a hole in the floor with a piece of wood covering the opening. | 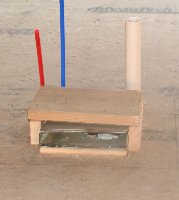 |
| You can identify a vent in a floor from below the floor. The HVAC crew will start by installing this piece of ductwork at the hole. | 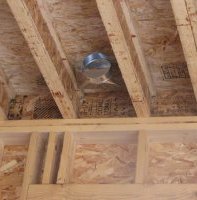 |
| Ducts are run vertically at the inside of the home, so the next step is to run the ductwork horizontally between the floor joists to an interior wall. | 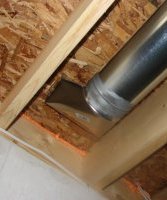 |
| In this example, you can see the duct come from the first floor basement, through an interior wall, and then up through the 2nd floor at the exterior of the home. | 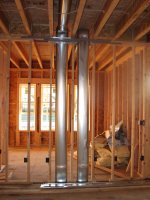 |
| Here, the duct work has only been roughed out, but you can tell from the location of the holes were the duct work will be. Then, you can keep your wires away from it. The second image on the right has a line indicating where the ductwork will be. | 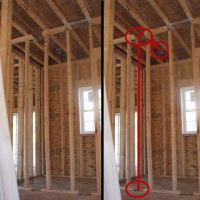 |
| If you see a sheet metal frame like this at the top of a wall, then it is a return. This metal indicates to the drywallers where to cut the hole for the return, and the metal will also hold the screws for the vent cover. | 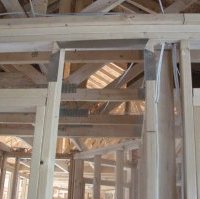 |
| This is a different style of return frame that has 4 sides instead of 3. | 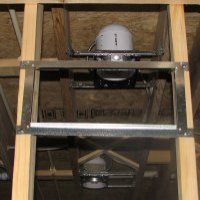 |
| This is what the return will look like when complete. | 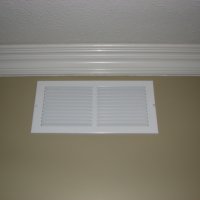 |
| Below the return will be a hole in the floor. This will be on an interior wall. If there is a metal frame at the top of the wall, then that tells you this is a return and not a second floor vent. | 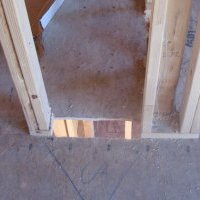 |
| Sometimes the builder will frame out the bottom of the wall in metal. This can prevent drywall cracks if someone kicks the wall. | 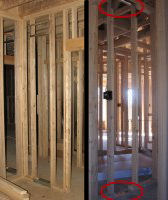 |
| Pictures of 2 different returns that show the hole in the floor and the frame for the return. | 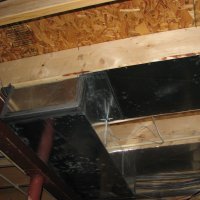 |
| There are 2 adjacent holes in the interior of the home. One of them already has a roughed in duct. Either the builder didn't finish, or the right hole is a second floor duct, and the left hole is a return. |  |
| Here are some other items you should be familiar with. The left tube is the flue. This will be directly above the water heater or furnace and can get very hot. The flue will run straight up through the roof. Next to that is a pre-installed radon tube in case radon gases start building up in the basement. This option is not found in most homes. The right most tube is a future-tube upgrade. The builder can install this tube so that the homeowner can run wires from the basement to the attic at a later time. | 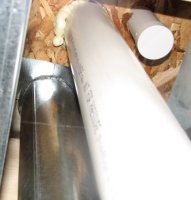 |
| This is a closer view of the future tube. Each end of the future tube is capped so that it doesn't act as a chimney in case of a fire. | 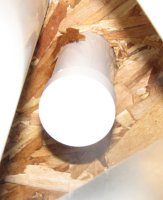 |
| This is what a central vacuum system looks like before the drywall is installed. | 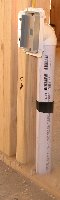 |
| Any holes drilled through floors or any electrical boxes on exterior walls should be insulated with caulk or expanding foam. |  |
Here are some examples of what not to do
There are a couple of new housing developments around where I live, and unfortunately it was too easy to find many examples of what not to do done by supposed professionals.
Click on any image to see a larger version.
| Here's what happens to your drywall when you try to put two electrical boxes on either side of the same stud. The builder will probably do a good job taping, but they usually cover up part of the box opening in the process. When you go back to square out the opening later, the spackle will break off in large chunks. | 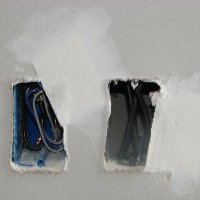 |
|---|---|
| Don't leave the wires in a mess in the basement, especially if the floor of the basement hasn't been poured yet. | 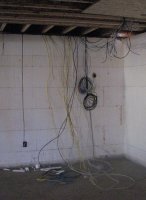 |
| Open back electrical boxes cannot be sealed to prevent cold air from coming in through the outlets (although this box is on an interior wall, so it wouldn't be sealed anyway). Also, the wires coming out of this box need to be cleaned up before the drywallers show up. | 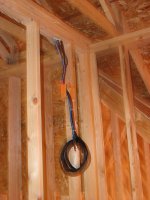 |
| I always prefer running wires through the floor/ceiling until I get above/under the outlet. Then I run the wire along side a stud, centered on the stud to reduce the chance someone puts a nail through it from either side, and stapled to the stud to keep in place. In this example, no one would expect an electrical wire to be running through the wall at that height, so it can be an electrical hazard. This wire would also need to be moved if you were to ever add an extension to your home or add a new door. | 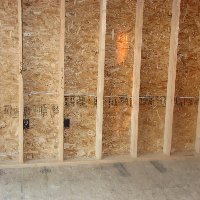 |
| Here is another instance of wires through a wall that also happened to be a return. Each hole had to be insulated with expanding foam. | 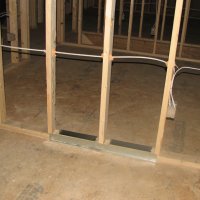 |
| Here's another horizontal wire through a wall where the electrician didn't realize that a medicine cabinet was going to be installed. This wire may prevent the cabinet from being pushed back all the way, and if the back of the medicine cabinet has sharp edges it could cut through the wire. | 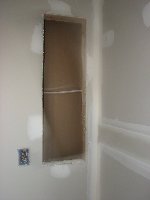 |
| Here's some wires running through a hole that was cut for ductwork. This duct is round, so there is a chance that it is the main flue, which would run much hotter than the other ducts. Building codes require that no wiring come in contact with the flue. Typically, they must be 1" away from the flue (from top to bottom). Plenum wires may be rated to handle this heat, but why take the chance. Also, when heating systems turn on the ductwork may flex a bit as the fans kick in. If the duct is touching the wires, then the wires may move against the wood floor and metal duct which may cause them to fray. There is plenty of room to run wiring, so just stay away from the ductwork. | 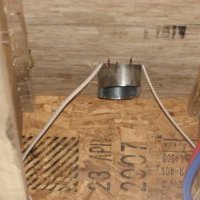 |
| Here is more wires running in a hole for ductwork. This is an interior wall, so it is either for a second floor vent or a return. If this is a return, then the wires will get boxed in the duct. | 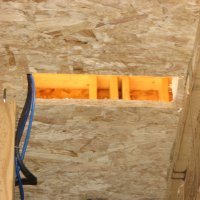 |
| Here is an example of wires running through a return between two floor joists as seen from the basement. While most ducts are tubes that you can work around, the return is usually a piece of sheet metal mounted between two floor joists. The floor joists and the floor make up 3 sides of the duct. The installers will put a piece of wood or metal at the end of this duct. Running wires through this area forces the installer to do some ugly work to go around the wiring, and the wires aren't easily accessible later. | 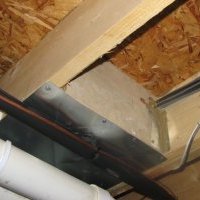 |
| The wire in this electrical box passes right through the box. This is done so that the wire doesn't get covered in spackle or paint. The bottom staple is only loosely holding the wire so that it can be pulled through later. If the builder insulates this box with caulk or expanding foam, you will not be able to pull the wire back through. | 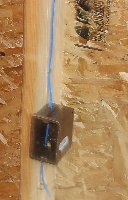 |
Some final warnings and special cases.
Any time you are attaching a wire to a stud or joist, use both a wire staple and a zip tie. Nail the staple into the wood and then use the zip tie to attach the wire to the staple. That way the sharp staple can't damage the wire.
Wire Staple With Zip Tie

After the electrical box is installed and all of the wires are pulled through, use some expanding foam to fill the holes in the electrical box to insulate it.
Insulated Electrical Box
Sometimes these engineered joists are used instead of 2x10's or 2x12's. These joists are stiffer and quieter than conventional lumber. Engineered joists CANNOT be notched. Instead you must drill holes through the middle of the joist. Some have pre-made punch outs so that you don't have to drill. if you do drill your own hole, make sure it is at least 6" away from the end of the joist.
Engineered I Beam Joist
Oversized engineered beams are rarely used in homes except when special conditions require it. Some types of these beams can be drilled through and some cannot. The safest bet is to never notch or drill through a LVL Engineered Beam.
Laminated Veneer Lumber - Engineered Beam or HeaderJoist
Aluminum studs should not be notched or drilled through. Instead use the pre-cut holes in the studs to run your wires. The premade holes shouldn't have any sharp edges. If the edges are sharp and there is no grommet covering the opening, then you will have to get your own or run your wire inside metal conduit.
Aluminum Framing